Reviews for the new Visual Studio 2012 seem overall positive. I tried it out and I like all the improvements. One thing I especially appreciated is the backwards project compatibility: Visual Studio 2012 and 2010 share the same project files format meaning each developer can decide when to upgrade (or not), rather than the entire team having to upgrade at the same time or keeping two sets of project files as was previously the case. About time!
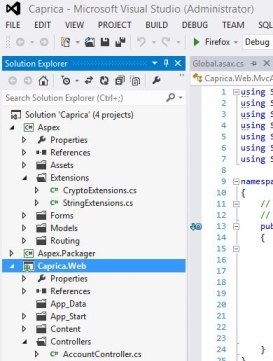
However there is one thing I didn’t like one bit: the user interface is atrocious. Everything is monochrome. The new icons are small, not intuitive and difficult to spot (without colors they all look alike). All the menus are UPPERCASE.
Andrew Binstock said in his review of Visual Studio 2012 (which is a good read – I recommend it):
Speaking off the record, a Microsoft employee with the Windows 8 team confessed that the Metro team was “very surprised” when they saw how the Visual Studio team had interpreted the Metro guidelines.
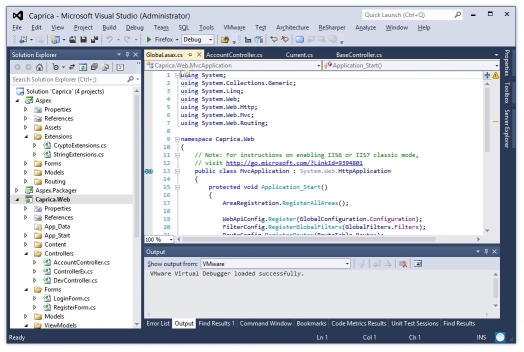
If you didn’t get a chance to see how the interface looks like here it is:
Fortunately with a few tweaks you can make Visual Studio 2012 look like VS 2010.
Step 1: Changing the icons and making menu items lowercase
The icons are embedded in the DLLs and there is no known way to change them through a simple plugin; you have to replace the newer icons with the older ones by directly patching the DLLs. FortunatelyVisual Studio Icon Patcher allows us to do just that.
It should take only a couple of minutes:
- Prerequisite: have both Visual Studio 2010 and 2012 installed.
- Make sure you have no open instances of Visual Studio (either version).
- Download the icon patcher and start
VSIP.exe. - Type in the console:
extract: Extracts the old icons from Visual Studio 2010.inject: Injects the previously extracted icons into Visual Studio 2012.menus: Makes menus lowercase.x: Quits the program.
We made some progress but we are not there yet. Everything is still too… gray.
Step 2: Changing the color theme
For this we need another small application: the Visual Studio 2012 Color Theme Editor. Using it is straightforward:
- Download and install it.
- Open Visual Studio (or restart it if it was previously open).
- You should see the Color Themes window (if not, open it by going toTools => Customize Colors).
- Select the blue theme.
Here we go! We now have an interface that is very similar to Visual Studio 2010.
Final result: